Showing posts with label ubuntu. Show all posts

Thursday, October 24, 2013

How to backup/wipe your hard disks using dd

I recently sold my old Dell Inspiron 1420 and bought a shiny new Lenovo Thinkpad T430. Now I intend to write a separate post about my experience with this new machine, but in this post I would like to cover some basics of the command line tool dd. This tool was extremely handy and helped me to securely wipe all data on my old hard drive before I parted with it. You can never rely on plain formatting to ensure that all sensitive information (personal files, saved passwords, etc.) from your old hard disk has been erased. However, there are a lot of tools out there that are an overkill for this task. This is where dd steps in - it is simple and present in most Linux distributions including the Ubuntu Live USB. However, it is also a very dangerous tool so make sure that you understand what you are doing before you blindly copy paste the commands into your terminal. You may end up with your data being permanently lost. So let's begin.

First of all the, basic structure of dd. A typical dd command will look like this:
user@pc: ~$ sudo dd if= of= bs= conv=
Here, if stands for the input file (could also be a partition or an entire drive), of for the output file (could also be a disk partition or an entire drive), bs stands for byte size (default value is 512) and the conv stands for conversion options. Specifying the byte size and conversion options are purely optional but highly recommended because of the following reasons:

a. The default value of byte size will be extremely slow. However, a little tweaking of this default value can increase the speed of the backup/wipe operation by up to 25 times! For example,
bs=4096
sets the block size to 4k, an optimal size for hard disk read/write efficiency and therefore, cloning speed.

b. Because dd is not very user friendly, it will not print any progress report while it running. But that is not the worst part, it will simply stop if it encounters a bad sector in your hard drive. The conversion options allow us to modify this behavior. For example,
conv=noerror,notrunc,sync
The noerror option all dd to just write zeros when it comes across bad sectors and then continue with the rest of the data. The sync option ensures that the sectors on the target and source device are aligned. The notrunc option or 'do not truncate' maintains data integrity by instructing dd not to truncate any data.

If you wish to know more, I highly recommend reading the wiki here (German only) or here.

Examples:
Important: Always find out the correct hard drive name/partition using sudo fdisk -l or sudo blkid. Incorrect use of the dd command can result in permanent loss of data!

a) Backup
If I wish to backup my linux partition which is /dev/sdb1 to a file on my external hard drive, the dd command will look like this:
user@pc: ~$ sudo dd if=/dev/sdb1 of=/media/EXTERNAL/hdd_backup.img bs=1M conv=noerror,notrunc,sync
b) Erase
If I intend to erase all data on my hard drive so that no one can recover it, I simply have to write the entire hard disk with zeros. Or better, I can write random values all over. Even better, I can run multiple passes of the same command and I will know that the data is beyond recovery even by . However, the process to generate and write random values is time consuming and unless you are a spy who is trying to destroy vital information, writing zeros (with 2 passes instead of 1) is good enough for the rest of us. Also, destroying the hard disk physically would be a better options in the former case. Let us say, I have to wipe the data on my /dev/sdb. I have two options, namely
Writing zeros:
user@pc: ~$ sudo dd if=/dev/zero of=/dev/sdb bs=1M conv=noerror,notrunc,sync
Writing random values:
user@pc: ~$ sudo dd if=/dev/zero of=/dev/sdb bs=1M conv=noerror,notrunc,sync
It goes without saying that you will need to boot from a Live USB in order to be able to wipe your primary hard drive. At this point, I should also mention that the byte size value is (obviously) mentioned in bytes but the following suffixes can be used for convenience.

SuffixMultiplier
KB1000 (ie 1KB equals 1000 bytes)
K1024 (ie, 1K equals 1024 bytes)
MB1000000 (= 1000 * 1000, that corresponds to 1000000 bytes 1MB)
M1048576 (= 1024 * 1024, 1M equals 1048576 bytes)
GB1000000000 (= 1000 * 1000 * 1000, ie 1GB equals 1 billion bytes)
G1073741824 (= 1024 * 1024 * 1024, d, h, 1G byte corresponds 1073741824)

Now, a little searching online led me to this website which tries to identify an ideal byte size (bs=131072) in order to optimize the speed of operation. But because I had not though this through I also have some of my own statistics to share. Because I had two disks, I could also compare the speeds using SATA and IDE interfaces. Here are the results:

SATA 5400 RPM Data written (GB) Time taken (mins) Average Speed (MB/s)
sudo dd if=/dev/urandom of=/dev/sdb 83 399.5 3.5
sudo dd if=/dev/zero of=/dev/sdb 159 115.0 23.0
sudo dd if=/dev/zero of=/dev/sdb bs=131072 750 165.5 75.5
IDE (PATA) 5400 RPM Data written (GB) Time taken (mins) Average Speed (MB/s)
sudo dd if=/dev/urandom of=/dev/sda 56 333.9 2.8
sudo dd if=/dev/zero of=/dev/sda 71 115.2 10.3
sudo dd if=/dev/zero of=/dev/sda bs=131072 160 72.5 36.8

As is pretty evident, the writing of randomly generated data is extremely slow and it will be faster to perform two passes of zero writes instead of one random write. Not to mention, it is next to impossible to recover data from a drive written with zeros, so using random values is pretty much overkill for the average Joe. Further, a change of byte size from the default values can speed up the entire process by up to 4 times.

Wednesday, October 16, 2013

XFCE Panel: Left Alignment Workaround

After my recent upgrade to Xubuntu 13.04, I noticed that my lower panel was left aligned. Although it is completely functional, I want my panel to extend to cover the entire width of the screen. It just makes it easier for me to locate the indicators for volume, notes and gmusicbrowser. Also, the panel keeps resizing as I open more applications which I find a little annoying. Here is what I did.

1. First of all, we need to fix the length of the bottom panel. To achieve this, right click on the bottom panel and navigate to Panel > Panel preferences. In this window make sure that the Length (%) is all the way up to 100% and the "Automatically increase the length" option is unchecked. Make the required changes and click on close - the changes are applied immediately without any confirmation.
 2. What we have now is a panel of fixed length. However, the indicators still keep moving dynamically. To make this nuisance disappear, we need to add a separator of expanding length to the right of the indicators. To achieve this, right click on the bottom panel once again and navigate to Panels > Add New Items. Scroll and select "Separator" and click on add.
3. Now that you have added the Separator, move it so that it now comes between the indicators/notification area and the window buttons. Also, click on the properties box on the right and choose the style as "Transparent" and check the option for "Expand". Now click close.
That should do it. If you followed the above steps, you should finally get your bottom panel to look like this
If you have messed up the configuration in the above steps or if you just wish to restore the default panels, you can do so easily by renaming (or deleting) the ~/.config/xfce4/panel/ directory and then restarting xfce4-panel.
user@pc: ~$ mv  ~/.config/xfce4/panel ~/.config/xfce4/panel-backup
user@pc: ~$ killall xfce4-panel
If the panel doesn't restart automatically, then press Alt+F2 and run:
xfce4-panel 

Installing a new hard disk without reinstalling Ubuntu/Windows

I own a 7-year old Dell Inspiron 1420 laptop, which comes with a 160 GB hard drive. My optical drive stopped working a couple of years ago and I had been contemplating getting a secondary hard drive. The only thing that kept me from it was the whole process of reinstalling my dual boot configuration on it. While Ubuntu installation is not too difficult and is done pretty quickly, I really hate having to reinstall Windows. The OS installation alone takes up a lot of time, not to forget the time required for installing additional programs like a good web browser, PDF reader, a compression program, antivirus, an office suite and vlc/mplayer - these are perhaps the most basic necessities that are needed to make your Windows functional.

A couple of months back, I decided to finally get an additional drive 750 GB drive and a caddy to place it securely in place of my optical drive. Choosing a caddy is easy - you just need to take care of two things : the size of the optical drive (12.5 or 9 mm) and the interface (IDE/SATA) that it uses to connect the motherboard. This is the same interface which is used to connect your optical drive and can be checked when you take out your optical drive.

Cloning the hard disk

Important Note:  /dev/sda refers to the complete hard drive and includes all partitions. /dev/sda1 refers to a specific partition of the same hard drive.

My home folder is on the same partition as the Ubuntu install. So I just cloned the two partitions using the terminal. My Ubuntu and Windows partitions were on /dev/sda1 and /dev/sda2 respectively. A good way to make sure you have the correct partition is to use the GParted tool (included in the Live CD) or the fdisk -l command at the terminal.
user@pc: ~$ sudo fdisk -l
Then I connected my external drive and used the following commands:
user@pc: ~$ dd if=/dev/sda1 of=/media/EXTERNAL/Ubuntu.img bs=4096
user@pc: ~$ dd if=/dev/sda2 of=/media/EXTERNAL/Win7.img bs=4096
I used this method because it does not require installing additional programs. For more ways of cloning, this article on lifehacker is a good read.

In the meantime, I used unetbootin to create a Ubuntu bootable USB. When the backup was done, I simply shut down my computer and replaced my primary hard drive with the new spacious one I had bought. The next step was to boot into Ubuntu using the live USB I had just made and then partition the new drive. I made a partition system similar to my previous one -
1. ext4 (Ubuntu)
2. NTFS (Windows 7)
3. NTFS (storage of common data files like Dropbox/Firefox profile/Music/etc.)

Note that I do not use any separate swap partition on my computer.

Of course, I made sure that the new partitions were at least the same size or bigger than the previous ones to ensure that the image file can be written back on them. When the partitions were made and properly formatted, I restored the OS installations on my new drive using the following commands:
user@pc: ~$ dd if=/media/EXTERNAL/Ubuntu.img of=/dev/sdb1 bs=4096
user@pc: ~$ dd if=/media/EXTERNAL/Win7.img of=/dev/sdb2 bs=4096
Yes, the new hard drive was mounted as /dev/sdb in my case. But you should check using the fdisk -l command to make sure you are restoring the images on the correct drives/partitions. Now, we are almost done.

Reinstalling the bootloader

One thing to notice here is that I cloned individual partitions instead of the whole drive. While this would have been also possible, I did it this way because I did not have enough free space on my external disk. Which is why the next step becomes important. I have two OS installations on the new hard drive now but no bootloader. To make this computer recognize the OS installs, I installed grub2 on the drive in the following way (Source: HowToUbuntu):

1. While still in the live CD/USB environment, open a terminal and mount the partition your Ubuntu Installation is on. Again, it can be found out by using GParted or the fdisk command.
user@pc: ~$ sudo mount /dev/sdb1 /mnt  
2. Now bind the directories that grub needs access to to detect other operating systems, in the following fashion
user@pc: ~$ mount --bind /dev /mnt/dev && sudo mount --bind /dev/pts /mnt/dev/pts && sudo mount --bind /proc /mnt/proc && sudo mount --bind /sys /mnt/sys
3. Now we need to change the apparent root directory of the live environment to the one on the Ubuntu partition we just mounted
user@pc: ~$ sudo chroot /mnt
4. Now install, check, and update grub. Grub is installed on the whole drive and not a single partition, so use /dev/sdb instead of /dev/sdb1 for the following set of commands
user@pc: ~$ grub-install /dev/sdb
user@pc: ~$ grub-install --recheck /dev/sdb
user@pc: ~$ update-grub
5. Now the grub installation is complete. All that is left is to exit the chrooted system and unmount everything.
user@pc: ~$ exit && sudo umount /mnt/dev && sudo umount /mnt/dev/pts && sudo umount /mnt/proc && sudo umount /mnt/sys && sudo umount /mnt
6. Shut down and turn your computer back on, and you will be met with the default grub2 screen.

That's it! Now you should have a completely running system with the same configuration as you had before. I have not tried doing this with a significant change in the system configuration. Even with those changes, Ubuntu should port to the new system configuration just fine. The only problem that you could face is with Windows because sometimes its WGA kicks in if it detects a change in your hardware.

Wednesday, March 27, 2013

My Conky Configuration (and how to set it up)

I have been a huge fan of Conky for some time now. However, I have always found tinkering with the configuration files and scripts too intimidating. So, I had been stuck on using the Clock Rings configuration.


Although it looks quite elegant, I was bored of it because I would rather use the space on my desktop for displaying information I care about. So, I went to work and tried my hand at it again. Making use of the resources I mentioned in my previous post, I finally tweaked the configuration to fit into my scheme of things. The end result looks something like this:

screen.png

Because I put a lot of effort into putting things into place, I think it is worth sharing it. Let me take this moment to point out that this configuration may not be the best for you. Heck, some people may also find it an eyesore. But the beauty of linux lies in that fact that it is customizable. The purpose is not to have a one-configuration-fits-all solution. Rather, it is to have a free knowledge base of ideas so that you can build your own setup that suits your purpose.

OK. Now that I have made my point, let's get back to business. So, what is required?

To make this configuration work as is, the following elements are needed:

1. The Conky Configuration File
2. Scripts for Weather, Google Calendar, External IP
3. Fonts

Let's have a look at each of them one by one:

Conky configuration file (.conkyrc)

#####################################
##     Conky Configuration File    ##
#####################################
alignment top_right
background yes
#border_margin 5
border_width 5
cpu_avg_samples 2
default_color white
default_outline_color 000000  # Black
default_shade_color 000000 # Black
double_buffer yes
draw_borders no
draw_graph_borders no
draw_outline no
draw_shades no
gap_x 10
gap_y 30
max_specials 1024
max_user_text 10000
maximum_width 380
minimum_size 380
net_avg_samples 2
no_buffers yes
override_utf8_locale yes
own_window yes
own_window_colour 000000 # Black
own_window_hints undecorated,below,sticky,skip_taskbar,skip_pager
own_window_transparent yes
own_window_type normal

own_window_argb_visual yes
own_window_argb_value 0

pad_percents 2
short_units yes
stippled_borders 3
text_buffer_size 8000
total_run_times 0
update_interval 1.0
uppercase no
use_spacer right
use_xft yes
xftalpha 0.75
xftfont Trebuchet MS:size=10

TEXT
#######################################
##     Current Day, Time and Date    ##
#######################################
${color white}${font ZegoeLight-U:pixelsize=40}${time %A %I:%M %p}${font}
${hr 1}
#Calendar Current Date Right
${voffset 10}${font Droid Sans:size=15}${alignr}${time %B}
${font Droid Sans:size=35}${alignr}${time %d}${font}
${font Droid Sans:size=10}${voffset 10}${alignr}${tztime Asia/Kolkata %H:%M} ${font Trebuchet MS:size=8}IST${font}
######################################
##      CALENDAR (5-Line)           ##
######################################
${voffset -98}${offset 175}${font DroidSansMono:size=7.55}${color3}${execpi 60 VinDSL_Cal_9=`date +%-d`; cal -h | sed -e 's/\r//g' -e 's/^/ /g' -e '1d' -e 's/\<'"$VinDSL_Cal_9"'\>/${color4}&${color3}/'}${font}
######################################
##      Weather - Now               ##
######################################
${texeci 500 bash ~/.conky/accuweather/acc_int_cwfont}${font}${voffset -95}${goto 30}${color ffe595}NOW${color}
${font conkyweather:size=60}${offset -5}${execi 600  sed -n '27p' ~/.conky/accuweather/curr_cond}${font}
${voffset -75}${goto 90}${execpi 600 sed -n '1p' ~/.conky/accuweather/messages}
${goto 90}${color ffe595}T: $color${execpi 600 sed -n '29p' ~/.conky/accuweather/curr_cond}°C (${execpi 600 sed -n '30p' ~/.conky/accuweather/curr_cond}°C)
${goto 90}${color ffe595}W: $color${execpi 600 sed -n '31p' ~/.conky/accuweather/curr_cond} ${execpi 600 sed -n '32p' ~/.conky/accuweather/curr_cond}
${goto 90}${color ffe595}H: $color${execpi 600 sed -n '33p' ~/.conky/accuweather/curr_cond}${voffset 30}
###########################################
##      Weather - Tonight and 2 Day      ##
###########################################
${goto 30}${color ffe595}TONIGHT${goto 145}${execpi 600 sed -n '5p' ~/.conky/accuweather/first_days}${goto 270}${execpi 600 sed -n '10p' ~/.conky/accuweather/first_days}$color${voffset 5}
${goto 10}${font conkyweather:size=30}${execi 600  sed -n '30p' ~/.conky/accuweather/first_days}${goto 140}${execi 600  sed -n '6p' ~/.conky/accuweather/first_days}${goto 265}${execi 600  sed -n '11p' ~/.conky/accuweather/first_days}${font}
${voffset -40}${goto 50}${execpi 600 sed -n '31p' ~/.conky/accuweather/first_days}°C (${execpi 600 sed -n '32p' ~/.conky/accuweather/first_days}°C)${goto 190}${execpi 600 sed -n '8p' ~/.conky/accuweather/first_days}°C (${execpi 600 sed -n '9p' ~/.conky/accuweather/first_days}°C)${goto 315}${execpi 600 sed -n '13p' ~/.conky/accuweather/first_days}°C (${execpi 600 sed -n '14p' ~/.conky/accuweather/first_days}°C)
${goto 50}${execpi 600 sed -n '3p' ~/.conky/accuweather/messages}${goto 190}${execpi 600 sed -n '4p' ~/.conky/accuweather/messages}${goto 315}${execpi 600 sed -n '5p' ~/.conky/accuweather/messages}${voffset 20}
##########################################
##      Music Section for Clementine    ##
##########################################
#${if_running clementine}${if_match "${execi 5 conkyClementine --datatype=ST}" == "Playing"}${goto 18}${if_match "${execi 5 conkyClementine --datatype=FN}" > "http"}${font Buttons and Switches JL:pixelsize=20}i${else}${font Buttons and Switches JL:pixelsize=20}h${endif}${font}${voffset -8}${goto 70}${execi 5 conkyClementine --datatype=TI} - ${execi 5 conkyClementine --datatype=AR}${endif}${if_match "${execi 5 conkyClementine --datatype=ST}" == "Paused"}${goto 18}${font Buttons and Switches JL:pixelsize=20}f${font}${voffset -8}${goto 70}${execi 5 conkyClementine --datatype=TI} - ${execi 5 conkyClementine --datatype=AR}${endif}${endif}
###################################################
##      Google Mail & Calendar Appointments      ##
###################################################
${font  Droid Sans:pixelsize=25}Upcoming${font}${font conkysymbols:size=12}${goto 310}c${font}${voffset -3}  ${execi 600 conkyEmail --servertype=IMAP --servername=imap.googlemail.com --username=USERID --password=PASSWORD --ssl} Unread
${hr 1}
${font Trebuchet MS:size=10}${execpi 1800 conkyGoogleCalendar --username=USERID --password=PASSWORD --daysahead=7 --dateformat="%a %d %b" --requestCalendarNames="Main;Tasks" --template=~/.conky/.conkyGoogleCalendartemplate | fold -w100}

#########################################
##      RSS Feeds                      ##
#########################################
${font  Droid Sans:pixelsize=25}Headlines${font}
${hr 1}
${rss http://feeds.bbci.co.uk/news/rss.xml?edition=int 30 item_titles 1}
${rss http://www.thehindu.com/news/?service=rss 30 item_titles 1}
${rss http://www.aljazeera.com/Services/Rss/?PostingId=2007731105943979989 30 item_titles 1}

########################################
##      System Information            ##
########################################
${font Droid Sans:pixelsize=25}System${font}${alignr}$kernel
${hr 1}
# ${cpugraph 20,210 000000 000000}
Core 1: ${cpu cpu0}% ${alignr}Core 2: ${cpu cpu1}%         
${cpubar 8,100 cpu} ${alignr}${cpubar 8,100 cpu}
${freq_g (1)} GHz/${exec sensors | grep "Core 0" | cut --bytes=14-21} $alignr ${freq_g (2)} GHz/${exec sensors | grep "Core 1" | cut --bytes=14-21}
#RAM Information
${font Trebuchet MS:size=10}RAM: ${mem} / ${memmax}${alignr}${membar 8,100} 
#Section for displaying top processes and their PID and CPU/Memory Usage
#${font Trebuchet MS:size=10}PROCESS ${goto 148}PID${goto 245}CPU% ${goto 350}MEM%
#${goto 9}${top name 1}${goto 140}${top pid 1}${goto 240}${top cpu 1}${goto 345}${top mem 1}
#${goto 9}${top name 2}${goto 140}${top pid 2}${goto 240}${top cpu 2}${goto 345}${top mem 2}
#${goto 9}${top name 3}${goto 140}${top pid 3}${goto 240}${top cpu 3}${goto 345}${top mem 3}
#HARD DISK Information
#Use $memperc% for percentage
Home: ${fs_used /home} / ${fs_size /home} ${alignr}${fs_bar 8,100 /home}
Data: ${fs_used /media/Data} / ${fs_size /media/Data} ${alignr}${alignr}${fs_bar 8,100 /media/Data}
Uptime: ${uptime}
Battery: ${battery_short BAT0} ${battery_time} ${alignr}${battery_bar 9,100 BAT0}
#Battery Temperature
#Battery: ${alignr}${battery_percent BAT0}% / ${acpitemp}°C
${execi 1800 vnstat -m -i wlan0 | grep "`date +"'%y"`" | tail -1 | awk '{print $1}'}: ${execi 1800 vnstat -m -i wlan0 | grep "`date +"'%y"`" | tail -1 | awk '{print $9 $10}'}${alignr}Average: ${execi 1800 vnstat -m -i wlan0 | grep "`date +"'%y"`" | tail -1 | awk '{print $12 " " $13}'}
#########################################
##      Network Information            ##
#########################################
#${font Droid Sans:pixelsize=25}Network${font}$alignr${wireless_essid wlan0}
#${hr 1}
#gateway IP: ${alignr}${gw_ip}
#Local IP: ${addr wlan0}${alignr}Public IP: ${execi 1800 ~/.conky/scripts/ip.sh}
#Today: ${totaldown wlan0} / ${totalup wlan0} ${alignr}Speed: ${downspeed wlan0}/${upspeed wlan0}
#${execi 1800 vnstat -m -i wlan0 | grep "`date +"'%y"`" | tail -1 | awk '{print $1}'}: ${execi 1800 vnstat -m -i wlan0 | grep "`date +"'%y"`" | tail -1 | awk '{print $9 $10}'}${alignr}Average: ${execi 1800 vnstat -m -i wlan0 | grep "`date +"'%y"`" | tail -1 | awk '{print $12 " " $13}'}

Scripts


Weather
The weather scripts are supposed to download the weather-related information from sites such as AccuWeather/WUnderground and extract useful information out of it. This information is then stored in text format to be utilized by the .conkyrc file. My configuration makes use of Teo's 1d2 accuweather script (acc_int_cwfont). While it is possible to use some of his other scripts, it will also require a lot of changes in the conky configuration file.

Google Calendar Template (.conkyGoogleCalendartemplate)
This script is just a template to present the appointment information in a specific way. I have written it to display the Event title, starting time and location. You could change it to display other variables like end time, etc.
${font Droid Sans:pixelsize=16}[title]
${font Droid Sans:pixelsize=14}[starttime]
${font Droid Sans:pixelsize=14}[location]

Script to find External IP (ip.sh)
This scripts uses the wget command to get your external IP from the dyndns website. You could a different website, with a little change in the latter half of the script if you know what the output looks like.
#!/bin/bash
# Script to Find External IP

wget http://checkip.dyndns.org/ -q -O - |
grep -Eo '\<[[:digit:]]{1,3}(\.[[:digit:]]{1,3}){3}\>'  

 Additional Fonts

The fonts I have used can be divided on the basis of Text and Symbols. The text fonts are easily replaced by a substitute of your choice. The symbols, however, cannot be. They are meant to display specific information like weather (Sunny/Cloudy/Rain) or Email.

Text Fonts
ZegoeLight-U, Droid Sans, Droid Sans Mono, Trebuchet MS

Symbol Fonts
Conkyweather (Weather Section), conkysymbols (Unread Emails Section), Buttons and Switches JL (Conky Clementine Section)

That pretty much concludes the configuration. With all of these elements, you can easily recreate the above configuration. :)

PS: Note that the paths in the Weather script(s)/configuration file need to be reconfigured for a different setup.


Credits

Figman (for Preliminary Design/Fonts Idea)
Didi79 (for Layout Idea)
Teo (for Weather)
VinDSL (for Calendar)

Sunday, February 24, 2013

How to Solve the Ubuntu Webcam Problem

I currently use Ubuntu 12.04 as my primary OS and every now and then I need to use Skype/GTalk for a video chat with my friends and family. Recently I made some major changes to my OS installation - including removing a lot of unused packages. This subsequently led to my webcam not working in either Cheese or Skype/Pidgin.  Because I did not remove any related packages intentionally, my guess is that Ubuntu does it when I use autoremove.

To troubleshoot such problems, the first and most obvious step is to find out where the problem lies - hardware (faulty webcam) or the drivers. I opened up a terminal (Ctrl + Alt + T) and typed in lsusb.

user@pc: ~$ lsusb

The lsusb command lists all the USB devices connected to the computer. I got the following output:

Bus 001 Device 001: ID 1d6b:0002 Linux Foundation 2.0 root hub
Bus 002 Device 001: ID 1d6b:0002 Linux Foundation 2.0 root hub
Bus 003 Device 001: ID 1d6b:0001 Linux Foundation 1.1 root hub
Bus 004 Device 001: ID 1d6b:0001 Linux Foundation 1.1 root hub
Bus 005 Device 001: ID 1d6b:0001 Linux Foundation 1.1 root hub
Bus 006 Device 001: ID 1d6b:0001 Linux Foundation 1.1 root hub
Bus 007 Device 001: ID 1d6b:0001 Linux Foundation 1.1 root hub
Bus 002 Device 002: ID 0bc2:5021 Seagate RSS LLC FreeAgent GoFlex USB 2.0
Bus 002 Device 004: ID 05a9:2640 OmniVision Technologies, Inc. OV2640 Webcam
Bus 003 Device 002: ID 0a5c:4500 Broadcom Corp. BCM2046B1 USB 2.0 Hub (part of BCM2046 Bluetooth)
Bus 006 Device 002: ID 046d:c05b Logitech, Inc. M-U0004 810-001317 [B110 Optical USB Mouse]
Bus 003 Device 003: ID 413c:8126 Dell Computer Corp. Wireless 355 Bluetooth
Bus 003 Device 004: ID 0a5c:4502 Broadcom Corp. Keyboard (Boot Interface Subclass)
Bus 003 Device 005: ID 0a5c:4503 Broadcom Corp. Mouse (Boot Interface Subclass)

This output clearly shows that my webcam is alive and kicking (on Bus 002 Device 004 - OmniVision Technologies Webcam). So this certainly means that it is not configured correctly or certain drivers are missing. I searched online for similar problems, and most of the answers relate to the infamous Skype problem. But my problem was different because even Cheese would not recognize my webcam. So I just checked for the packages libv4l and v4l-utils. They were missing! autoremove had fucked up. So I reinstalled these packages by using the following command in the terminal.

user@pc: ~$ sudo apt-get install libv4l* && sudo apt-get install v4l*

I used the wildcards(*) because I do not know which ones are required. I know Ubuntu has a way of installing the required dependencies but then again, relying on it had led to this problem in the first place. After installing the above mentioned packages, I restarted my laptop and voila - my webcam was up and running. So for all of you folks who have had a similar problem after an update or other changes to your system, try this method out.

EDIT : Sometimes the problem occurs because the webcam is mounted as video1 instead of the default video0. To be sure that this is the problem , open up a terminal and type in the following command to display the output of your webcam:

user@pc: ~$ vlc v4l2:///dev/video0

Alternatively, you can use mplayer to do the same job:
user@pc: ~$ mplayer -tv driver=v4l2:gain=1:width=640:height=480:device=/dev/video0:fps=10:outfmt=rgb16 tv://

Replace the video0 to video1 in the above commands if you receive an error message like this one (for vlc):
Your input can't be opened:
VLC is unable to open the MRL 'v4l2:///dev/video0'. Check the log for details.
This method is quite powerful and can be used as a sureshot method of finding out if there is a driver issue or not.

However, my problem is that the webcam freezes a few seconds after I launch it using Cheese/Skype/VLC/MPlayer. This seems to be a recurring bug with many users, and a kernel upgrade has been reported to fix this problem.

Monday, August 15, 2011

Dual Boot Windows and Ubuntu (with Ubuntu installed first)

I use my laptop for a number of purposes, and gaming is not one of them, and it works just fine with Ubuntu 11.04 as the sole OS. However, I recently decided to let go of my desktop and realized my laptop was not ready as a complete replacement yet. Now, I had two options : installing Windows on a virtual machine using VirtualBox or setting up a dual boot. The first is a very good option, especially if you have enough RAM and a decent processor; and it also has the advantage of switching between the OS a breeze. However, with my limited resources, I settled on the second option.

The easiest way to set up a dual boot on a computer with Windows already installed is by Wubi. Setting up a dual boot on computer with Ubuntu installed is a little more complicated than that.


Here is what you will need:
1. Windows ISO OR Windows Installation CD/USB
2. Ubuntu ISO OR Ubuntu Live CD/USB
3. USB Drive
4. UNetbootin
Note: If you wish to install Windows 7, you can also use A Bootable USB to burn the ISO. It needs a Windows host, though.

Step1. Download the Ubuntu ISO and UNetbootin. The installation instructions for UNetbootin for both Windows and Linux are here. You may skip the manual download of the Ubuntu ISO as UNetbootin can also do the same for you. It is simply a matter of choice.

Step2. Run UNetbootin. Select Diskimage>ISO and enter the path for the Ubuntu ISO file. Alternatively, you may download the distribution of your choice directly from the internet. Then Select USB Drive as the Type and sdbX (where X is usually 1) as the Drive. Click OK.


Step3. Now, you need to have your partitions in place. With Ubuntu as the sole OS, there would typically be two partitions - Ubuntu Installation Partition and Swap. You would need to resize the Ubuntu partition using GParted to make space for a Windows installation - you can only do this using a Ubuntu Live CD/USB. Select the Try Ubuntu option and go to System>Administration>GParted to make the partitions.


The Ubuntu partitions are typically in ext3 or ext4. Windows and other shared partitions should be NTFS. For my computer, I have set up two 30 GB partitions for Ubuntu and Windows installations, and another 80 GB for the common data - Dropbox, Music, Documents, etc. The other 5 GB is in Swap.

Step4. Repeat the steps 1 and 2, with the Windows ISO instead of Ubuntu ISO. The size of the USB drive used in this step should be at least 4 GB.

Important: If you are just overwriting the same USB drive used in Step2, remember to copy the Ubuntu ISO in a common drive before proceeding. Windows CANNOT access the Ubuntu filesystem and you may have to re-download the Ubuntu ISO if you do not have a backup.

Step5. Now, restart your computer and ensure that the USB drive is given the highest preference in your boot sequence in the BIOS settings. Boot your computer using the USB drive and install Windows.

Step6. After Windows has been installed, you will realize that you are unable to access the Ubuntu partition. This is because Windows overwrites the MBR. At this point of time,you would require UNetbootin and the Ubuntu ISO again. Repeat steps 1 and 2.

Step7. To restore the MBR, we will make use of a free software called Boot-Repair. Boot your computer using the Ubuntu Live USB. Select the Try Ubuntu option and run the terminal. Type in the following commands in the terminal:

sudo add-apt-repository ppa:yannubuntu/boot-repair
sudo apt-get update && sudo apt-get install -y boot-repair

Step8. Finally, fire up Boot-Repair and select First Repair and click Apply.


Bingo! The dual boot has been set up successfully on your computer. Now, you can merge your Dropbox, Firefox, Pidgin and Thunderbird profiles between Ubuntu and Windows so that your settings for chat and internet are always synced. The simplest way to do it is to set it up in Windows or relocating the profile from Ubuntu to Windows folder, as Windows cannot access the Ubuntu filesystem.

For Firefox, you can always use Firefox Sync or XMarks to sync all settings between different computers and also the different OS on the same computer. But, sharing a single profile is more convenient and logical for the same computer.

Friday, April 15, 2011

Installing Ubuntu 10.10 Maverick Meerkat

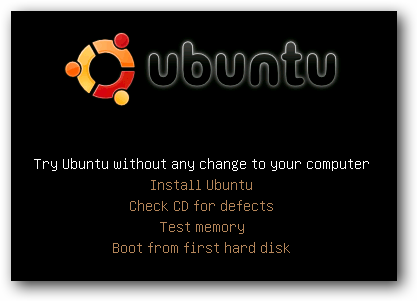
Courtesy: Ubuntu Official Website

For all of you whose blood begins to boil at the very mention of Windows, its time for a change. And the most user-friendly alternative out there is Ubuntu. I would even go the extent of saying that Ubuntu is, in fact, better than Windows in terms of stability, security and cost. The Ubuntu community is vast, helpful, and constantly developing better alternatives. If you really cannot let go of Windows, you can always try a dual boot, which is made easier by installing Windows first and then using wubi.
For first timers, the Ubuntu website and the Ubuntu wiki, together form a great way to get started. The installation process is trivial, and most of it has already been documented. At this point I would just like to add that Ubuntu Desktop should be the one you should be aiming to install. Go for the Ubuntu Netbook version ONLY IF you don't have a decently powerful laptop or are really looking for that extra juice out of your battery.

What I intend to discuss here is the installation of Ubuntu using a pen drive, for which you should follow the steps below:

1. Download the version of Ubuntu you want to install. Get it from the official website or download via torrents. I prefer to download torrents as the chances of downloading a corrupt ISO are minimal.
For Ubuntu Desktop Edition:
http://www.ubuntu.com/desktop/get-ubuntu/download
http://www.ubuntu.com/desktop/get-ubuntu/alternative-download
For Ubuntu Netbook Edition:
http://www.ubuntu.com/netbook/get-ubuntu/download
http://www.ubuntu.com/netbook/get-ubuntu/alternative-download

2. Check the md5 sum of the downloaded file. The md5 checksum is a sure way of verifying if the downloaded file is error free.
More information and utilities to check md5sum:
https://help.ubuntu.com/community/HowToMD5SUM

3. If your pen drive is larger than 1 GB, you would want to partition it first. When I tried installing Ubuntu on my Dell Inspiron 1420, it would get stuck on "Preparing to install". It took me a while (a whole night, in fact ;)) to figure out that it was because of the pen drive itself. After making a primary partition of about 700 MB, the installer worked just fine.
An excellent guide to partitioning your USB drive:
http://www.uwe-sieber.de/usbtrouble_e.html#partitioning

4. Now download a suitable software to write the downloaded ISO to the primary partition of the USB drive. I used the Universal USB Installer from my Windows 7 machine.
More information on writing ISO to USB:
http://www.ubuntu.com/desktop/get-ubuntu/download


5. Now fire up your computer and enter the BIOS setup. Change the boot order to increase the priority of the USB drive to highest.
Guide to changing the boot sequence in your BIOS:
http://pcsupport.about.com/od/fixtheproblem/ss/bootorderchange.htm

6. And you're done! Reboot with the USB drive plugged in and choose Install Ubuntu. You can also try Ubuntu as a Live OS, before installing it on your computer. The best part of this is that you use your computer and browse the internet normally during the install. Now, that is cool!