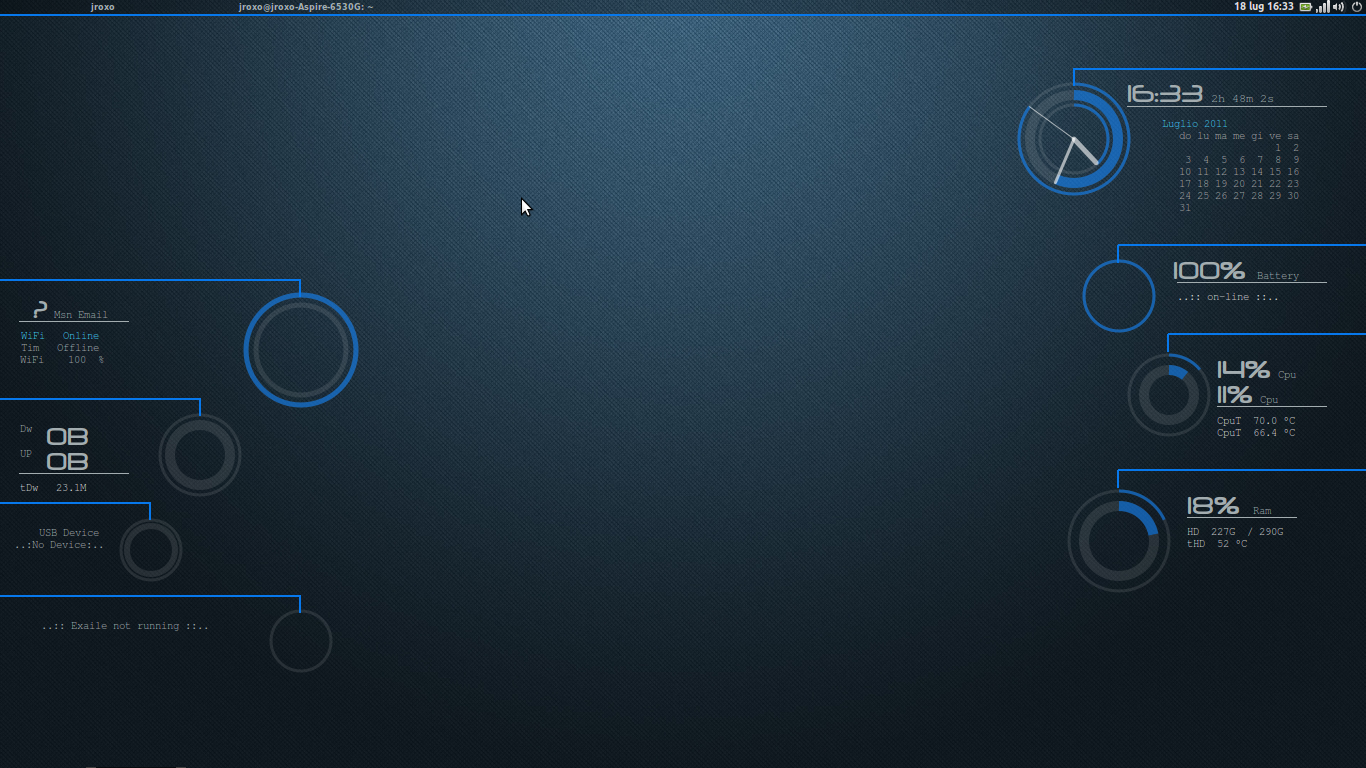
I have been a huge fan of
Conky for some time now. However, I have always found tinkering with the configuration files and scripts too intimidating. So, I had been stuck on using the Clock Rings configuration.
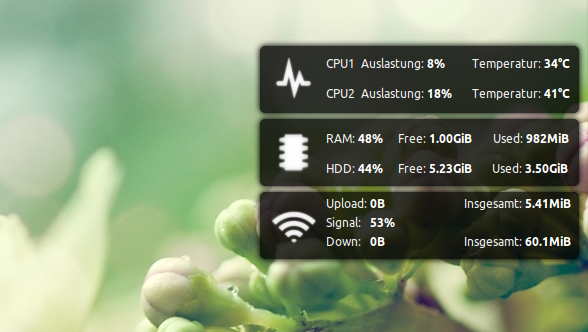
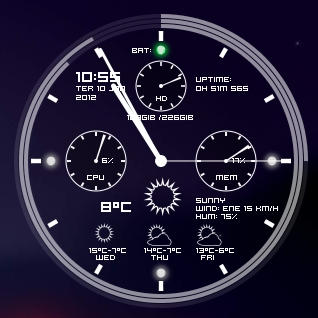
Although it looks quite elegant, I was bored of it because I would rather use the space on my desktop for displaying information I care about. So, I went to work and tried my hand at it again. Making use of the resources I mentioned in my previous post, I finally tweaked the configuration to fit into my scheme of things. The end result looks something like this:

Because I put a lot of effort into putting things into place, I think it is worth sharing it. Let me take this moment to point out that this configuration may not be the best for you. Heck, some people may also find it an eyesore. But the beauty of linux lies in that fact that it is customizable. The purpose is not to have a one-configuration-fits-all solution. Rather, it is to have a free knowledge base of ideas so that you can build your own setup that suits your purpose.
OK. Now that I have made my point, let's get back to business. So, what is required?
To make this configuration work as is, the following elements are needed:
1. The Conky Configuration File
2. Scripts for Weather, Google Calendar, External IP
3. Fonts
Let's have a look at each of them one by one:
Conky configuration file (.conkyrc)
#####################################
##     Conky Configuration File    ##
#####################################
alignment top_right
background yes
#border_margin 5
border_width 5
cpu_avg_samples 2
default_color white
default_outline_color 000000  # Black
default_shade_color 000000 # Black
double_buffer yes
draw_borders no
draw_graph_borders no
draw_outline no
draw_shades no
gap_x 10
gap_y 30
max_specials 1024
max_user_text 10000
maximum_width 380
minimum_size 380
net_avg_samples 2
no_buffers yes
override_utf8_locale yes
own_window yes
own_window_colour 000000 # Black
own_window_hints undecorated,below,sticky,skip_taskbar,skip_pager
own_window_transparent yes
own_window_type normal

own_window_argb_visual yes
own_window_argb_value 0

pad_percents 2
short_units yes
stippled_borders 3
text_buffer_size 8000
total_run_times 0
update_interval 1.0
uppercase no
use_spacer right
use_xft yes
xftalpha 0.75
xftfont Trebuchet MS:size=10

TEXT
#######################################
##     Current Day, Time and Date    ##
#######################################
${color white}${font ZegoeLight-U:pixelsize=40}${time %A %I:%M %p}${font}
${hr 1}
#Calendar Current Date Right
${voffset 10}${font Droid Sans:size=15}${alignr}${time %B}
${font Droid Sans:size=35}${alignr}${time %d}${font}
${font Droid Sans:size=10}${voffset 10}${alignr}${tztime Asia/Kolkata %H:%M} ${font Trebuchet MS:size=8}IST${font}
######################################
##      CALENDAR (5-Line)           ##
######################################
${voffset -98}${offset 175}${font DroidSansMono:size=7.55}${color3}${execpi 60 VinDSL_Cal_9=`date +%-d`; cal -h | sed -e 's/\r//g' -e 's/^/ /g' -e '1d' -e 's/\<'"$VinDSL_Cal_9"'\>/${color4}&${color3}/'}${font}
######################################
##      Weather - Now               ##
######################################
${texeci 500 bash ~/.conky/accuweather/acc_int_cwfont}${font}${voffset -95}${goto 30}${color ffe595}NOW${color}
${font conkyweather:size=60}${offset -5}${execi 600  sed -n '27p' ~/.conky/accuweather/curr_cond}${font}
${voffset -75}${goto 90}${execpi 600 sed -n '1p' ~/.conky/accuweather/messages}
${goto 90}${color ffe595}T: $color${execpi 600 sed -n '29p' ~/.conky/accuweather/curr_cond}°C (${execpi 600 sed -n '30p' ~/.conky/accuweather/curr_cond}°C)
${goto 90}${color ffe595}W: $color${execpi 600 sed -n '31p' ~/.conky/accuweather/curr_cond} ${execpi 600 sed -n '32p' ~/.conky/accuweather/curr_cond}
${goto 90}${color ffe595}H: $color${execpi 600 sed -n '33p' ~/.conky/accuweather/curr_cond}${voffset 30}
###########################################
##      Weather - Tonight and 2 Day      ##
###########################################
${goto 30}${color ffe595}TONIGHT${goto 145}${execpi 600 sed -n '5p' ~/.conky/accuweather/first_days}${goto 270}${execpi 600 sed -n '10p' ~/.conky/accuweather/first_days}$color${voffset 5}
${goto 10}${font conkyweather:size=30}${execi 600  sed -n '30p' ~/.conky/accuweather/first_days}${goto 140}${execi 600  sed -n '6p' ~/.conky/accuweather/first_days}${goto 265}${execi 600  sed -n '11p' ~/.conky/accuweather/first_days}${font}
${voffset -40}${goto 50}${execpi 600 sed -n '31p' ~/.conky/accuweather/first_days}°C (${execpi 600 sed -n '32p' ~/.conky/accuweather/first_days}°C)${goto 190}${execpi 600 sed -n '8p' ~/.conky/accuweather/first_days}°C (${execpi 600 sed -n '9p' ~/.conky/accuweather/first_days}°C)${goto 315}${execpi 600 sed -n '13p' ~/.conky/accuweather/first_days}°C (${execpi 600 sed -n '14p' ~/.conky/accuweather/first_days}°C)
${goto 50}${execpi 600 sed -n '3p' ~/.conky/accuweather/messages}${goto 190}${execpi 600 sed -n '4p' ~/.conky/accuweather/messages}${goto 315}${execpi 600 sed -n '5p' ~/.conky/accuweather/messages}${voffset 20}
##########################################
##      Music Section for Clementine    ##
##########################################
#${if_running clementine}${if_match "${execi 5 conkyClementine --datatype=ST}" == "Playing"}${goto 18}${if_match "${execi 5 conkyClementine --datatype=FN}" > "http"}${font Buttons and Switches JL:pixelsize=20}i${else}${font Buttons and Switches JL:pixelsize=20}h${endif}${font}${voffset -8}${goto 70}${execi 5 conkyClementine --datatype=TI} - ${execi 5 conkyClementine --datatype=AR}${endif}${if_match "${execi 5 conkyClementine --datatype=ST}" == "Paused"}${goto 18}${font Buttons and Switches JL:pixelsize=20}f${font}${voffset -8}${goto 70}${execi 5 conkyClementine --datatype=TI} - ${execi 5 conkyClementine --datatype=AR}${endif}${endif}
###################################################
##      Google Mail & Calendar Appointments      ##
###################################################
${font  Droid Sans:pixelsize=25}Upcoming${font}${font conkysymbols:size=12}${goto 310}c${font}${voffset -3}  ${execi 600 conkyEmail --servertype=IMAP --servername=imap.googlemail.com --username=USERID --password=PASSWORD --ssl} Unread
${hr 1}
${font Trebuchet MS:size=10}${execpi 1800 conkyGoogleCalendar --username=USERID --password=PASSWORD --daysahead=7 --dateformat="%a %d %b" --requestCalendarNames="Main;Tasks" --template=~/.conky/.conkyGoogleCalendartemplate | fold -w100}

#########################################
##      RSS Feeds                      ##
#########################################
${font  Droid Sans:pixelsize=25}Headlines${font}
${hr 1}
${rss http://feeds.bbci.co.uk/news/rss.xml?edition=int 30 item_titles 1}
${rss http://www.thehindu.com/news/?service=rss 30 item_titles 1}
${rss http://www.aljazeera.com/Services/Rss/?PostingId=2007731105943979989 30 item_titles 1}

########################################
##      System Information            ##
########################################
${font Droid Sans:pixelsize=25}System${font}${alignr}$kernel
${hr 1}
# ${cpugraph 20,210 000000 000000}
Core 1: ${cpu cpu0}% ${alignr}Core 2: ${cpu cpu1}%
${cpubar 8,100 cpu} ${alignr}${cpubar 8,100 cpu}
${freq_g (1)} GHz/${exec sensors | grep "Core 0" | cut --bytes=14-21} $alignr ${freq_g (2)} GHz/${exec sensors | grep "Core 1" | cut --bytes=14-21}
#RAM Information
${font Trebuchet MS:size=10}RAM: ${mem} / ${memmax}${alignr}${membar 8,100}
#Section for displaying top processes and their PID and CPU/Memory Usage
#${font Trebuchet MS:size=10}PROCESS ${goto 148}PID${goto 245}CPU% ${goto 350}MEM%
#${goto 9}${top name 1}${goto 140}${top pid 1}${goto 240}${top cpu 1}${goto 345}${top mem 1}
#${goto 9}${top name 2}${goto 140}${top pid 2}${goto 240}${top cpu 2}${goto 345}${top mem 2}
#${goto 9}${top name 3}${goto 140}${top pid 3}${goto 240}${top cpu 3}${goto 345}${top mem 3}
#HARD DISK Information
#Use $memperc% for percentage
Home: ${fs_used /home} / ${fs_size /home} ${alignr}${fs_bar 8,100 /home}
Data: ${fs_used /media/Data} / ${fs_size /media/Data} ${alignr}${alignr}${fs_bar 8,100 /media/Data}
Uptime: ${uptime}
Battery: ${battery_short BAT0} ${battery_time} ${alignr}${battery_bar 9,100 BAT0}
#Battery Temperature
#Battery: ${alignr}${battery_percent BAT0}% / ${acpitemp}°C
${execi 1800 vnstat -m -i wlan0 | grep "`date +"'%y"`" | tail -1 | awk '{print $1}'}: ${execi 1800 vnstat -m -i wlan0 | grep "`date +"'%y"`" | tail -1 | awk '{print $9 $10}'}${alignr}Average: ${execi 1800 vnstat -m -i wlan0 | grep "`date +"'%y"`" | tail -1 | awk '{print $12 " " $13}'}
#########################################
##      Network Information            ##
#########################################
#${font Droid Sans:pixelsize=25}Network${font}$alignr${wireless_essid wlan0}
#${hr 1}
#gateway IP: ${alignr}${gw_ip}
#Local IP: ${addr wlan0}${alignr}Public IP: ${execi 1800 ~/.conky/scripts/ip.sh}
#Today: ${totaldown wlan0} / ${totalup wlan0} ${alignr}Speed: ${downspeed wlan0}/${upspeed wlan0}
#${execi 1800 vnstat -m -i wlan0 | grep "`date +"'%y"`" | tail -1 | awk '{print $1}'}: ${execi 1800 vnstat -m -i wlan0 | grep "`date +"'%y"`" | tail -1 | awk '{print $9 $10}'}${alignr}Average: ${execi 1800 vnstat -m -i wlan0 | grep "`date +"'%y"`" | tail -1 | awk '{print $12 " " $13}'}
Scripts
Weather
The weather scripts are supposed to download the weather-related information from sites such as AccuWeather/WUnderground and extract useful information out of it. This information is then stored in text format to be utilized by the .conkyrc file. My configuration makes use of
Teo's 1d2 accuweather script (acc_int_cwfont). While it is possible to use some of his other scripts, it will also require a lot of changes in the conky configuration file.
Google Calendar Template (.conkyGoogleCalendartemplate)
This
script is just a template to present the appointment information in a specific way. I have written it to display the Event title, starting time and location. You could change it to display other variables like end time, etc.
${font Droid Sans:pixelsize=16}[title]
${font Droid Sans:pixelsize=14}[starttime]
${font Droid Sans:pixelsize=14}[location]
Script to find External IP (ip.sh)
This scripts uses the wget command to get your external IP from the dyndns website. You could a different website, with a little change in the latter half of the script if you know what the output looks like.
#!/bin/bash
# Script to Find External IP

wget http://checkip.dyndns.org/ -q -O - |
grep -Eo '\<[[:digit:]]{1,3}(\.[[:digit:]]{1,3}){3}\>'
Additional Fonts
The fonts I have used can be divided on the basis of Text and Symbols. The text fonts are easily replaced by a substitute of your choice. The symbols, however, cannot be. They are meant to display specific information like weather (Sunny/Cloudy/Rain) or Email.
Text Fonts
ZegoeLight-U, Droid Sans, Droid Sans Mono, Trebuchet MS
Symbol Fonts
Conkyweather (Weather Section), conkysymbols (Unread Emails Section), Buttons and Switches JL (Conky Clementine Section)
That pretty much concludes the configuration. With all of these elements, you can easily recreate the above configuration. :)
PS: Note that the paths in the Weather script(s)/configuration file need to be reconfigured for a different setup.
Credits
Figman (for Preliminary Design/Fonts Idea)
Didi79 (for Layout Idea)
Teo (for Weather)
VinDSL (for Calendar)